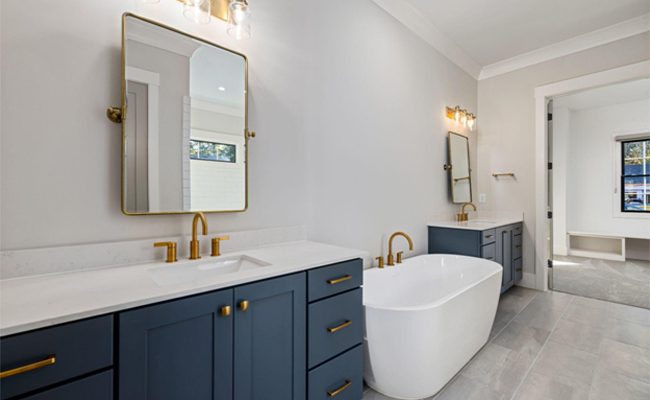
There is more than strikes the eye when choosing a faucet to a sink. Even though you might be pulled to a particular style, it is vital to consider other factors as well, such as how the tap will fit with your basin, the components that are hidden beneath the elegant finish, whichever handle type would best suit your requirements, and others. [Read more…] about Find Quality Bathroom Faucets With a Few Tips
Bathroom
Maximizing Space and Functionality: How Kitchen Remodeling Services Can Help?
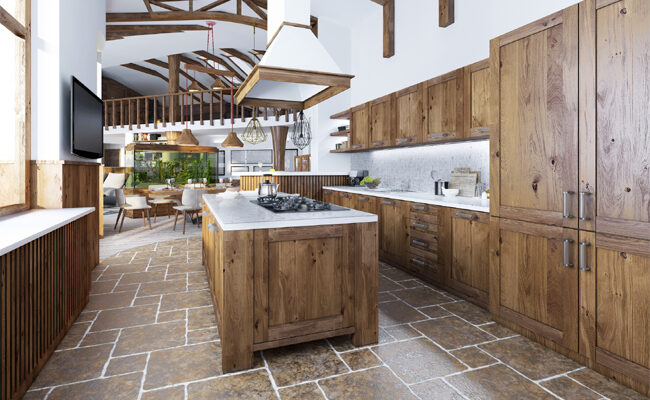
Having a functional and well-designed kitchen is essential in any home. It is the heart of the house, where meals are prepared, family members gather, and memories are made. [Read more…] about Maximizing Space and Functionality: How Kitchen Remodeling Services Can Help?
how to protect bathroom floor from water
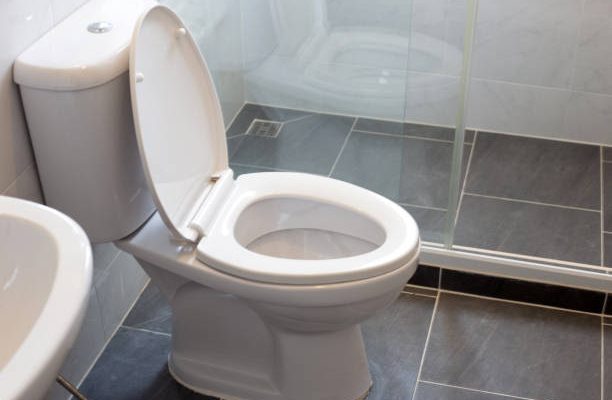
Bathroom floors are prone to water damage due to their frequent exposure to water. It is important to protect bathroom floors from water to prevent damage, and there are several steps you can take to do this. Firstly, ensure that any water spills are quickly and thoroughly dried up. Secondly, make sure that the bathroom floor is regularly cleaned and sealed in order to prevent water from seeping into the surface. Thirdly, use bath mats and rugs to absorb excess water and reduce the risk of slipping. Finally, use waterproof sealants or coatings to protect the floor and make it resistant to water damage. By taking these steps, you can keep your bathroom floor safe and dry.
Identifying the Causes of Water Damage to the Bathroom Floor
Water damage to the bathroom floor can cause a host of problems, ranging from mold and mildew buildup to structural damage. This blog aims to look at the various causes of water damage in the bathroom and provide tips for preventing and mitigating it. We’ll explore common sources of water leakage, such as broken pipes, overflowing toilets, and leaking faucets, and discuss how to identify them. We’ll also look at the importance of properly sealing and waterproofing the bathroom floor and walls to prevent water damage. Finally, we’ll discuss what to do when water damage has already occurred, including tips for restoring the structural integrity of the bathroom and preventing future damage. By the end of this blog, you’ll be equipped with the necessary knowledge to identify and prevent water damage in the bathroom, protecting your home from costly repairs.
Understanding the Different Flooring Options for Your Bathroom
When it comes to making your bathroom look and feel perfect, flooring is a crucial part of the equation. With so many different options available, it can be hard to know which flooring is the best for your specific bathroom. Fortunately, understanding the different types of flooring available can help you make the perfect choice. From traditional tile and vinyl to luxurious marble and wood, there is a perfect flooring option out there for every bathroom. Think about your budget, how much maintenance you are willing to do, and the overall look and feel you want your bathroom to have. By taking all of these factors into consideration, you can find the perfect flooring for your bathroom.
How to Seal and Protect Your Bathroom Floor
Having a bathroom floor that looks and feels great is a must for any home. But, keeping that floor looking great and protecting it from water damage can be a challenge. So, here’s how to seal and protect your bathroom floor: First, you’ll need to clean the floor thoroughly. Use a mild detergent and rinse off any residue. Then, apply a sealant to the floor. It should be applied in thin, even coats. Allow each coat to dry before applying the next one. Finally, make sure to apply a water-resistant finish. This will help prevent water damage and other types of wear and tear. With these simple steps, your bathroom floor will stay looking and feel great for years to come.
Tips for Reducing Water Damage on the Bathroom Floor
Water damage on your bathroom floor can be unsightly, costly, and time-consuming to repair. To help you avoid this potential disaster, here are four tips for reducing water damage on the bathroom floor:
1. Use a quality shower curtain. Choose a shower curtain made from a material that won’t easily absorb water, such as vinyl or polyester.
2. Clean regularly. Regularly sweeping and mopping your bathroom floor will help prevent water buildup from occurring.
3. Install mats. Place mats near the shower and sink to help absorb extra water and keep it from spreading.
4. Seal tiles. Sealing your bathroom tiles can help create a barrier against water, reducing the chances of water damage.
By following these simple tips, you can help keep your bathroom floor water-damage-free. A little preventive maintenance can go a long way in avoiding costly repairs.
Preventative Maintenance for Protecting your Bathroom Floor
Preventative maintenance is key for keeping your bathroom floor looking and functioning its best. By following a few basic steps, you can help avoid costly and time-consuming repairs in the future. For example, make sure to clean up any spills and debris as soon as possible, and use rugs and mats in the area to absorb moisture. Regularly clean and seal your floors to avoid water damage, and check for any cracks or other signs of wear and tear. By taking the necessary steps to protect your bathroom floor, you can enjoy a long-lasting, beautiful space for years to come.
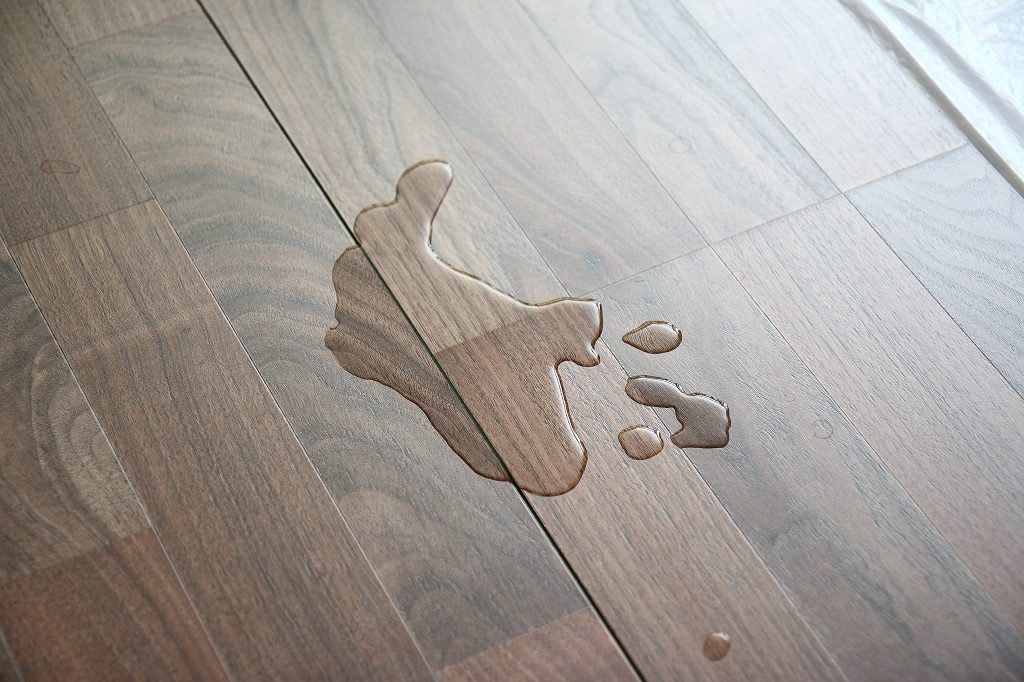
Credit: https://esbflooring.com/blog/how-to-protect-hardwood-flooring-against-the-moisture/
Cleaning and Care Tips for Keeping your Bathroom Floor in Good Condition
Maintaining a clean bathroom floor requires a bit of love and care, but it doesn’t have to be a chore. To keep your bathroom floor in good condition, try these cleaning and care tips: Sweep and vacuum regularly to remove dirt and debris. Mopping once a week with warm water and mild detergent will help to remove stains and other buildup. Use a non-abrasive cleaner and cloth to remove tough spots, and then rinse with clean water. Finish with a high-quality sealant to protect your floor from water damage and mildew. Finally, be sure to dry the floor completely after cleaning to prevent mold and mildew growth. With these simple cleaning and care tips, you can keep your bathroom floor looking great for years to come.
How to Repair Water Damage to Your Bathroom Floor
When you have water damage to your bathroom floor, it can be an inconvenience and a costly repair. Taking the time to properly repair the damage is essential to ensuring the longevity of your floor. Here are some steps to help you repair water damage to your bathroom floor. 1. Assess the damage – Take a look at the area and see how severe the damage is. 2. Clean the area – Use a damp cloth to remove any standing water and debris that may be present. 3. Dry the area – Use a fan to blow air across the area to help it dry. 4. Check for mold or mildew – If any is present, use a specific cleaner to eradicate it. 5. Replace damaged flooring – If the damage is too severe, you may need to replace the affected flooring. 6. Apply sealant – To help protect the new or existing flooring from further damage, apply a sealant. 7. Monitor – On a regular basis, monitor the area for signs of further damage. Following these steps should help you repair water damage to your bathroom floor quickly and effectively.
Best Practices for Waterproofing Your Bathroom Floor
Waterproofing your bathroom floor is an important step to preventing water damage in your home. It can be easy to overlook, but it can save you a lot of money and hassle in the long run. Here are some best practices for waterproofing your bathroom floor:
- Start by thoroughly cleaning the floor to remove any dirt, dust, or debris.
- Apply a sealant to the floor that is designed specifically for bathrooms.
- Use a primer to help the sealant adhere better.
- Use a brush to apply the sealant evenly across the floor.
- Make sure to allow enough time for the sealant to dry completely before walking on it.
- Reapply the sealant every few years to ensure maximum protection.
- Consider adding grout between tiles, which can help to create an even more waterproof surface.
- Lastly, use a waterproof mat or rug in front of your sink to further prevent water damage.
Following these best practices will help to ensure that your bathroom floor is properly waterproofed and remains protected from water damage for years to come.
What to Do if You Have an Ongoing Water Leak in Your Bathroom
A water leak in your bathroom can be a major issue, especially if it’s an ongoing one. If you are experiencing an ongoing leak, the first step is to find and repair the source of the leak. This may require a professional plumber, so it is best to contact one for assistance. Once the source of the leak is repaired, it is important to minimize further damage to your bathroom. This may include cleaning up any standing water, drying out wet areas with a towel or fan, and replacing any damaged items. Lastly, it is important to keep an eye on your water bill to make sure the leak is indeed fixed and that the issue has been taken care of properly.
Troubleshooting Common Causes of Water Damage to the Bathroom Floor
Water damage to the bathroom floor can be a major headache. It can cause unsightly mold and mildew, not to mention potentially costly repairs. In this blog post, we’ll help you troubleshoot the most common causes of water damage to the bathroom floor and provide tips on how to prevent it. From a faulty toilet seal to a clogged shower drain, we’ll cover it all so you can keep your bathroom looking and functioning at its best. We’ll also help you identify potential signs of water damage before it becomes a bigger problem. With our help, you can be sure your bathroom floor is safe and sound.
preparing for Emergencies to Protect Your Bathroom Floor
We all know that a bathroom floor can be a tricky thing to maintain in pristine condition. To protect your bathroom floor against any untoward accidents, it is important to prepare for any emergencies. This means being aware of the potential hazards that could cause damage to your floor, such as leaking pipes, overflowing tanks, and blocked drains. Taking the time to inspect your bathroom for any potential issues, and making sure all necessary repairs are made, can help prevent costly repairs down the road. Additionally, having the right cleaning supplies on hand can help make quick work of any messes, and protect your bathroom floor from any further damage. Taking preventive steps and being prepared for any potential emergencies can help you keep your bathroom floor in tip-top shape.
Conclusion
To protect your bathroom floor from water, make sure to regularly clean and dry your bathroom floor after every use. Additionally, consider adding a bathmat or rug in front of the shower or bathtub to help absorb extra water. You can install a non-skid mat or adhesive strips to help reduce slipping and sliding. You can also consider using elegant marble-patterned shower wall panels to create a sophisticated and easy-to-maintain bathing space. Finally, seal any tile floors with a waterproof sealant to help protect them from moisture damage over time. By following these simple steps, you can help protect your bathroom floor from water damage.
High Pitched Noise Coming From Bathroom Fan When Off
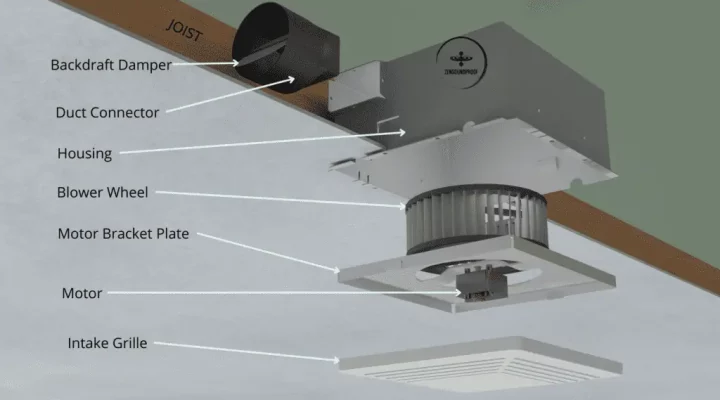
If you are hearing a high-pitched noise coming from your bathroom fan when it is turned off, it could be an indication of a problem with the fan motor. This is especially true if the noise is continuous and loud, and it does not stop when you turn the power off. Usually, this type of noise is caused by a bearing that has worn out or become seized up or a fan blade that is out of balance. If the sound is coming from the fan motor, it is important to have it checked out and repaired by a qualified technician.
Identifying the Problem
The first step in problem-solving is identifying the problem. It is important to identify the problem accurately because the solution can only be as successful as the diagnosis. Taking the time to assess the situation and pinpoint the cause of the issue can save time and money in the long run. It is important to look at the issue from multiple angles and gain perspectives from outside sources. By doing so, you can ensure that all potential problems are considered and that the root cause is addressed. Ultimately, it is important to take the time to identify the problem before attempting to come up with a solution.
Troubleshooting Common Causes
Troubleshooting common causes can be a daunting task, especially if you’re not sure where to start. Fortunately, troubleshooting is a skill that can be learned. It involves the process of identifying and resolving issues that can arise from a variety of sources. To be successful, it’s important to think logically and methodically and to check common sources of problems such as hardware, software, and network configurations. By identifying the cause and coming up with a solution, you can save time, money, and frustration. The key is to be persistent and resourceful and to approach each problem with a clear and focused mindset. With the right tools and knowledge, you can troubleshoot common causes and get back to business in no time.
Replacing the Fan Blade
Replacing the fan blade is a fairly simple DIY job. With the right tools and a few simple steps, you can easily replace the fan blade and get your cooling system back in working order. First, turn off the power to the fan and remove the guard. Then, carefully remove the old blade and replace it with a new one. Make sure it is securely attached and then reattach the guard. Finally, turn the power back on and enjoy the cooling benefits of your new fan blade. With a few simple steps, you can easily replace the fan blade and ensure your cooling system stays in working order.
Replacing the Fan Motor
Replacing a fan motor is an important part of properly maintaining your fan. It can be a time-consuming and occasionally expensive process, but it is necessary to keep your fan running smoothly and safely. With a few basic tools and some patience, you can replace your fan’s motor and get back to enjoying a cool breeze in no time. Whether you’re replacing a broken motor or upgrading to a more powerful one, understanding the basics of a fan motor replacement will make your job easier and ensure your fan is running in top condition.
Cleaning the Fan Blades
Cleaning fan blades is an essential part of maintaining the efficiency and effectiveness of your fan. Not only can it help you avoid costly repairs or replacements, but it’s also a great way to keep your fan running optimally. It’s easier than you think to clean fan blades – simply turn them off and use a duster or damp cloth to wipe down the blades. Be sure to get into all the crevices and corners, and don’t forget to clean the fan motor housing as well. Taking a few minutes to clean the fan blades will help you enjoy a cooler, healthier, and more efficient home.
Preventative Maintenance Tips
Preventative maintenance is one of the most important steps you can take to keep your home in top shape. Not only will it help prevent costly repairs down the road, but it also can help you save time and money in the long run. Our blog on Preventative Maintenance Tips provides helpful information on how to keep your home in good condition. We cover everything from how to check for leaks to how to clean your gutters. We also provide advice on which maintenance tasks you should prioritize and how to spot potential problems before they become costly repairs. With our tips, you can stay on top of your home’s upkeep and keep it in good condition for years to come.
FAQs About the High-Pitched Noise Coming From Bathroom Fan When Off
What causes a high-pitched noise to come from my bathroom fan when it’s off?
This could be caused by an issue with the fan’s motor, bearings, or other components. It’s best to contact a professional for an inspection and repair.
Is it safe to leave my bathroom fan running if there’s a high-pitched noise coming from it?
No, it’s not safe to leave your fan running if you hear a high-pitched noise. Turn it off and contact a professional to inspect and repair it.
Can I fix a high-pitched noise coming from my bathroom fan without professional help?
No, it’s best to contact a professional for an inspection and repair of your fan. It’s possible to cause additional damage if you attempt to repair it yourself.
Conclusion
The high-pitched noise coming from the bathroom fan when it is off can indicate that the fan motor is having trouble and needs to be replaced. It could also be caused by a buildup of dirt or dust in the fan, which can cause the fan to vibrate and make a high-pitched noise. It is important to inspect and clean the fan regularly to prevent this from happening. If the noise persists, it is best to contact a professional to have the fan checked and replaced, if necessary.
Bathroom Addition Cost Bay Area
Homeowners in the Bay Area who are looking to add an extra bathroom can expect to pay anywhere from $10,000 to $50,000, depending on the size and complexity of the project. The cost of bathroom addition in the Bay Area typically includes the cost of materials, labor, and permits. The cost of a basic bathroom addition will vary depending on the size and features that are added. Factors such as plumbing, fixtures, layout, and finishes will all influence the overall cost of the project. Additionally, the cost of bathroom additions in the Bay Area can be impacted by the local cost of living and overall demand for certain services.
Overview of Bathroom Addition Costs in The Bay Area
This blog post provides an overview of the costs associated with adding a bathroom to a home in the Bay Area. We’ll discuss the costs for both small and large bathroom additions, and discuss the factors that can affect the total cost of the project. We’ll also look at the different types of finishes that are available, from basic to luxury, and provide tips on how to save money while still having a beautiful bathroom. Lastly, we’ll provide some local resources that can help you find the best deals on bathroom supplies and services. Whether you’re looking to do a full remodel or just add a powder room, this post will help you get the most out of your bathroom addition project.
Materials & Labor Costs for Bathroom Additions
The cost of adding a bathroom to your home can vary greatly depending on the materials and labor required to get the job done. When it comes to materials, you’ll need to consider both plumbing fixtures and the materials used to build the walls and flooring. Plumbing fixtures can range from basic sinks, toilets, and showers to more luxurious upgrades such as heated tile floors and rain shower heads. In terms of the actual construction, you’ll need to factor in costs for drywall, tiling, flooring, and electrical outlets. Labor costs will depend on the complexity of the job, with more complicated projects requiring more time and expertise from professional contractors. By taking the time to research the materials and labor costs for your bathroom addition, you can ensure that you’re getting the most bang for your buck.
Cost-Saving Tips for Bathroom Additions
Adding a bathroom to your home can be a costly endeavor, but there are ways to save money on the project. With a few clever cost-saving tips, you can keep your bathroom addition budget-friendly. To begin with, consider using recycled materials or secondhand fixtures. Reclaimed wood, vintage tiles, and salvaged fixtures can give your bathroom a unique look and feel while cutting down on costs. Secondly, focus on the essentials. When remodeling a bathroom, it can be tempting to go all-out, but you can still create a beautiful bathroom without breaking the bank. Prioritize the features you need most and focus on those. Lastly, don’t be afraid to DIY. There are plenty of DIY projects you can tackle yourself, such as painting, tiling, and installing a new sink. You can even find online tutorials and helpful tools to help you complete the job. By following these cost-saving tips, you can give your bathroom a stunning makeover without breaking the bank.

Image source: https://www.angi.com/articles/how-much-does-bathroom-remodel-cost.htm
Common Mistakes to Avoid When Adding a Bathroom
Adding a bathroom can be a great way to increase the value of your home. However, there are some common mistakes that can be easily avoided when doing this. First, ensure that the plumbing and wiring are up to code. It is important to get a professional to inspect and approve any major changes you make to ensure that everything is safe and up to standard. Secondly, make sure that all of the materials you use, such as tiles, fixtures, and sinks, are of good quality and will last. Lastly, consider the size of the space you are working with. If the bathroom is too big, it can take away from the rest of the home. Similarly, if it is too small it may feel cramped and uninviting. By taking the time and effort to plan and design the perfect bathroom, you can ensure that it is a great addition to your home.
Permits & Building Codes for Bathroom Additions
Adding a bathroom to your home can be an intimidating process, but it doesn’t have to be. To ensure that your project is up to code, it’s important to be aware of the building and permits required for bathroom additions. Before starting any construction project, make sure you have all the permits necessary for the job. This includes permits for the installation of plumbing and electricity, as well as any permits needed to make structural changes to the building. Once the permits are in place, you’ll need to familiarise yourself with local building codes. Building codes are designed to safeguard the safety and health of the public, so make sure you comply with all relevant codes when adding a bathroom to your home. Taking the time to check the necessary permits and building codes can help ensure a successful bathroom addition project.
Financing Bathroom Additions in The Bay Area
Are you looking to finance bathroom additions in the Bay Area? Whether you’re ready to transform your existing bathroom into a luxurious spa-like retreat or you’re adding a brand-new bathroom to your home, financing bathroom additions can be a great way to make your dream a reality. With the right financing plan, you can achieve the bathroom of your dreams without breaking the bank. From tile and fixtures to plumbing and beyond, financing bathroom additions in the Bay Area is easier than ever before. With a range of financing options, you can find a plan that works for your budget and lifestyle. Get ready to turn your bathroom into a place of luxury and relaxation with the help of financing.
FAQs About the Bathroom Addition Cost Bay Area
Q: What is the average cost of a bathroom addition in the Bay Area?
A: The average cost of a bathroom addition in the Bay Area is approximately $15,000 to $25,000 depending on size, layout, and materials used.
Q: Are there any additional costs associated with a bathroom addition in the Bay Area?
A: Yes, there are additional costs associated with a bathroom addition in the Bay Area, such as permits, plumbing, electrical work, and labor costs.
Q: What should I consider when planning for a bathroom addition in the Bay Area?
A: When planning for a bathroom addition in the Bay Area, it is important to consider factors such as size, layout, and materials used, as well as the additional costs associated with a bathroom addition.
Conclusion
The cost of adding a bathroom in the Bay Area can vary greatly depending on the size and complexity of the project. The cost will also vary depending on the type of materials used and the labor involved. Generally, the Bay Area is an expensive area to complete any kind of remodeling project. However, with careful planning and research, it is possible to find a reasonable price for a bathroom addition.