Your home is your refuge – where you recharge and find comfort at the end of each day. But over time, the walls can start to feel dull and dated. The once vibrant colors fade, and chip, and you feel uninspired walking through the rooms. A fresh coat of paint is an easy and affordable way to transform the look and feel of your home inside and out. A new palette can make old spaces modern, inviting a renewed sense of happiness and relaxation.
In this guide, we will break down everything you need to know to paint your home’s interior and exterior successfully. From selecting the right colors to prepping surfaces to application techniques, we’ll cover all the steps so you can say goodbye to that dreary feeling and hello to a home that lifts your spirit every time you walk through the door.
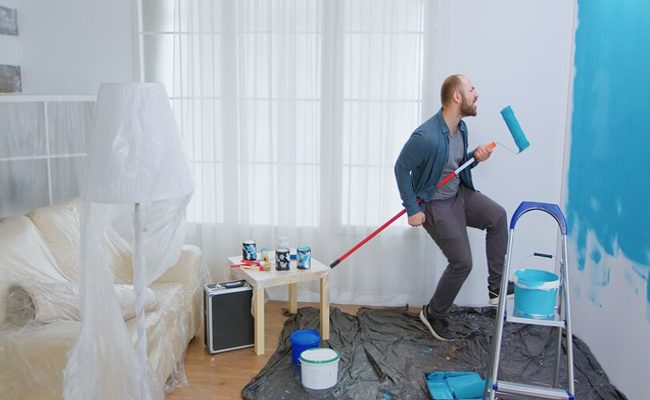
Tips & Tricks for a Paint Refresh
Breathing new life into your home with a fresh coat of paint is not just about changing colors; it’s about creating an atmosphere that reinvigorates your living space. However, before jumping into this DIY project, you must arm yourself with the right techniques and insights to achieve a professional-looking finish. Whether you’re tackling the interior or the exterior, preparation, patience, and precision are your key allies. In the following sections, we’ll unveil some tried-and-tested tips to help you paint like a pro.
Choose the Right Paint Type
Selecting the appropriate paint type is crucial for your project’s success. Water-based paints are preferred for their quick drying time and ease of clean-up. For exteriors, choose weather-resistant paints that can withstand the elements.
Invest in Quality Tools
Investing in high-quality brushes, rollers, and paint sprayers can significantly affect the application’s smoothness and finish. Quality tools not only make the job easier but also help you achieve a more professional look.
Prepare Your Surfaces
A thorough preparation of the walls is vital for a flawless paint job. This includes cleaning, sanding, and priming the surfaces to ensure the paint adheres well and lasts longer.
Test Colors Before Committing
Always test paint colors on small sections of the wall before committing to painting an entire room. This allows you to see how the color looks in different lighting conditions throughout the day.
Use Painter’s Tape for Clean Edges
Apply painter’s tape along edges and corners where walls meet trim or ceilings for sharp, clean lines. Ensure the tape is smooth and fully adhered to avoid paint bleeding underneath.
Keep a Wet Edge
To avoid lap marks, always work from wet to dry areas and keep a wet edge. This technique involves overlapping each stroke slightly with the next to ensure a smooth, uniform coat.
Maintain a Consistent Paint Sheen
Choosing a consistent sheen across your room can significantly impact the overall aesthetic and durability of your paint job. Matte or flat finishes hide imperfections well but can be challenging to clean, making them ideal for ceilings and low-traffic areas. Satin or semi-gloss finishes, on the other hand, are easier to clean and are perfect for high-traffic areas like kitchens and bathrooms. Consistency in sheen helps in creating a cohesive look throughout your space.
Plan Your Painting Strategy
Before you begin painting, plan your approach. Start from the top and work your way down. Begin with the ceilings, then move on to the walls, and finally, address the trim and any detailing. This method ensures that you can correct any drips or errors as you go, keeping the finish clean and professional.
Invest in Drop Cloths
Protect your floors, furniture, and fixtures by investing in quality drop cloths. While plastic sheeting may seem like an economical choice, it can be slippery and unsafe. Canvas drop cloths, although more expensive, are safer and offer better protection because they absorb paint drips without seeping through.
Stay Patient with Drying Times
Allow adequate drying time between coats and before removing painter’s tape. Rushing this process can lead to smudges or peeling, diminishing the quality of your paint job. Refer to the paint can for recommended drying times, and consider factors like humidity and temperature, as these can affect drying times as well.
Practice Proper Cleanup and Storage
Good practices extend beyond just the painting process. Cleaning your tools thoroughly will extend their life and ensure they’re ready for your next project. For water-based paints, rinse brushes and rollers with warm, soapy water. For oil-based paints, you’ll need mineral spirits or paint thinner. Also, properly seal and store leftover paint for touch-ups and small projects in the future. Store cans upside down in a cool, dry place to prevent air entry and reduce the chances of the paint drying out.
Consult with Professionals
While painting your home yourself can save money, sometimes it’s best to consult with professionals for larger or more complicated projects. This is especially true for homes with unique structures and surfaces that require specialized techniques and tools. Click here to learn more about professional painting services and how they can help you achieve your desired results.
FAQ
Q: How long will it take to paint my home?
A: The time required for a paint job depends on various factors, such as the size of your home, the number of coats needed, and drying times. For an average-sized room with two coats of paint, it can take approximately 4-6 hours.
Q: Do I need to use a primer before painting?
A: Primer is essential for achieving a smooth and long-lasting finish. It helps the paint adhere better and also covers any stains or imperfections on the walls.
Q: Can I mix different types of paint sheens?
A: It’s not recommended to mix different types of paint sheens, as it can result in an uneven finish and may even affect the durability of the paint.
Q: What is the best way to clean my paint tools?
A: For water-based paints, rinse brushes and rollers with warm, soapy water. For oil-based paints, use mineral spirits or paint thinner. Make sure to thoroughly clean and dry your tools before storing them for future use.
Q: Can I paint over the wallpaper?
A: It’s not recommended to paint over wallpaper, as it can result in an uneven finish and may even cause the wallpaper to peel. It’s best to remove the wallpaper before painting. However, if you must paint over it, make sure to prime the walls first and use a high-quality primer for better adhesion.
Q: How often should I repaint my home?
A: The frequency of repainting your home depends on various factors, such as the quality of paint used, the climate in your area, and the amount of wear and tear your walls endure. On average, interior walls should be repainted every 5-7 years, while exterior walls may need to be repainted every 7-10 years.
Final Thoughts
Painting your home can be a fun and rewarding DIY project, but it’s essential to approach it with the right tools, techniques, and knowledge. Taking the time to properly prepare your surfaces, test colors, and plan your strategy can help you achieve professional-looking results that will last years.
And don’t forget to consult with professionals when needed, as their expertise can ensure a successful and efficient paint job. With these tips in mind, you can confidently take on any painting project to transform your space into a beautiful and refreshed home.
Leave a Reply