Why Prep Walls For Painting?
Prepping your walls before painting is critical for achieving a professional looking paint job. The process is simple, but important, and will ensure that your paint job looks its best.
First, you’ll want to remove any nails or screws from the wall. Next, use a putty knife to fill in any holes or cracks. Once the holes are filled, sand the area until it’s smooth. Because every municipality has different regulations when it comes to drywall removal, it is best to consult with a professional demolition company.
Next, you’ll need to wash the walls with a mild detergent to remove any dirt or grease. Once the walls are dry, you’re ready to start painting!
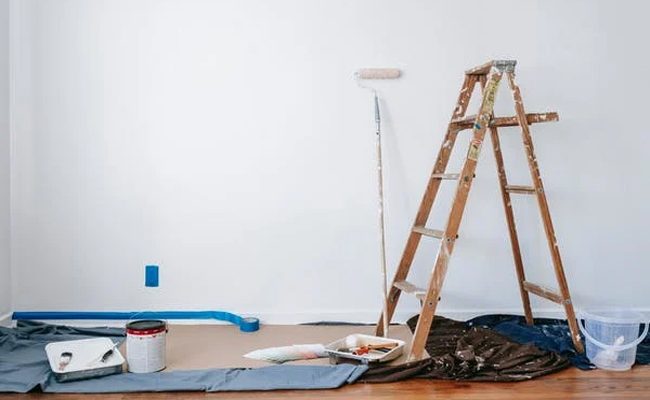
What You’ll Need
- Ladder
- Filling Blades
- Caulking Gun
- Sandpaper
- Sponge
- Brush
- Paint Rollers
- Trays
- Drop Cloths
When you are painting a room in your home, you will need to prep the walls before you start painting. This can seem like a daunting task, but it is actually not too difficult. Here is what you will need to do to prep your walls for painting:
First, you will need to remove any furniture or other items from the room. You don’t want to paint around these items, as it will make the job much more difficult.
Once the room is empty, you can then start cleaning the walls. Use a damp cloth to wipe down the walls, and be sure to remove any cobwebs or other debris.
Next, you will need to sand the walls. This will help to create a smooth surface for painting. Be sure to use a fine-grit sandpaper so that you don’t damage the walls.
How To Prep New Walls
If you’re painting new walls, there are a few things you need to do to prep them first. This will help ensure that your paint job looks its best.
Next, you’ll need to fill any holes or cracks that may be present. Once the compound is dry, sand it down until the surface is smooth.
Now you’re ready to start painting! Be sure to use a primer before applying your topcoat of paint. This will help the paint adhere better and give you better coverage.
How To Prep Old Walls
Start by wiping down the entire surface to remove any dirt, grease, or other residues that may be present.
Next, use a medium-grit sandpaper to lightly sand the walls. This will help create a smooth surface for the new paint to adhere to. Be sure to wipe away any dust created by sanding before continuing.
Finally, apply a primer to the walls using a roller and brush. This will help the new paint color go on evenly and provide better coverage. Allow the primer to dry completely before painting the walls with your desired color.
How To Prep Dry Walls
Whether you’re getting ready to paint or simply patching up some cracks, prepping your walls is an essential first step. But if you’re not used to working with drywall, it can be tricky to know where to start.
Start by identifying any damage. If there are small holes or cracks, you can use spackle or joint compound to fill them in. For larger areas of damage, you may need to cut out a section of drywall and replace it with a new piece.
Once you’ve repaired the damage, sand down the area until it’s smooth. Then wipe away any dust with a damp cloth and you’re ready to paint or wallpaper over the area.
How To Prep Exterior Walls
Whether you’re painting your entire house or just a couple of sections, it’s important to prep your walls before you get started.
This will help the paint go on smoothly and evenly, and it will also help to prevent any chips or cracks in the paint later on. Here are a few tips on how to prep your exterior walls for painting.
Start by giving your walls a good wash with a hose or pressure washer. This will remove any dirt or grime that has built up on your walls over time. Also inspect your walls for any cracks or holes that may need repairing. These need to be filled in before you start painting, otherwise the paint will not adhere properly.
Once your walls are clean and smooth, it’s time to prime them. This step is important because it will help your paint to last longer and look better once applied.
Select the paint you want to use and apply it with a brush or roller. Continue applying paint until the area is completely covered. Let the first coat of paint dry for the recommended time before applying the top-coat. Be sure to clean your brush or roller after use and store away for your next painting project!
Bottom Line
Walls are the foundation of any painting project. Properly preparing your walls before beginning to paint is crucial in ensuring a professional looking and long lasting finish. By following these simple steps, you can be sure that your painting project will turn out looking its best. possible. If you’re going with one color, keep the other components neutral.
What To Do Next?
After you’ve prepped your walls for painting, it’s time to start painting! But before you can start, you need to decide on a color. Once you’ve chosen a color, buy the amount of paint you’ll need for the project. To calculate how much paint you need, figure out the square footage of the area you’re painting and consult the paint can for coverage.
You can discover more painting tips and tricks by visiting metropaintingbrisbane.com.au.
Leave a Reply