Did you know that you can have sparkling utensils in the kitchen even without a dishwashing machine? Well, apart from using a dishwasher, you can effectively and efficiently wash dishes in a single-bowl sink.
Single sinks are traditional and popular fittings found in most farmhouse kitchens. They are also available in diverse sizes and brands. Sink Formula says these particular sinks can serve many important purposes, including dishwashing, food prep, and general kitchen use.
So, before you begin the dishwashing process, you need a guide. Fortunately, we will look at the proper use of a single-bowl kitchen sink.
How to Wash Dishes in a Single Bowl Sink
Homeowners use different strategies for washing dishes in a large single sink. However, here is an easy way to wash dishes in a single sink.
Usually, seven steps are involved in cleaning dishes with only one big sink.
Step-by-Step Guide
Time Duration to wash dishes in a single sink: 30 to 45 minutes (depending on the number of dishes).
Items and tools you’ll require:
To wash dishes in a single sink the traditional way requires expertise. But with the correct guide, you will avoid creating a mess in the kitchen. Always have the necessary utilities for efficient results.
Dishwashing supplies:
- Dishwashing detergent (lemon-scented)
- Scouring pad or silicone sponge
- Scouring powder or dish brush
- Dishwashing gloves (if necessary)
- Lint-free cloth or paper towel
Step 1: Scrape leftovers from the dishes
Scrapping leftovers is an essential step. So, remove leftovers from the dishes physically to avoid clogging your single-basin sink. Removing the leftovers is also necessary if you do not have a garbage disposer or a basket strainer in the sink.
You can also use a paper towel to get rid of the leftovers.
Step 2: Sorting the dishes
After scraping off the leftovers, sort the dishes before you begin washing them.
Separate the cups from the ceramic plates. Keep the spoons, knives, vegetable peeler, whisk, and other stainless steel silverware together. You can place the dishes on the sink tray or even the countertop to leave your sink free.
Tip: Sorting the dishes allows you to wash the utensils more quickly and efficiently.
Step 3: Pre-soaking the dishes
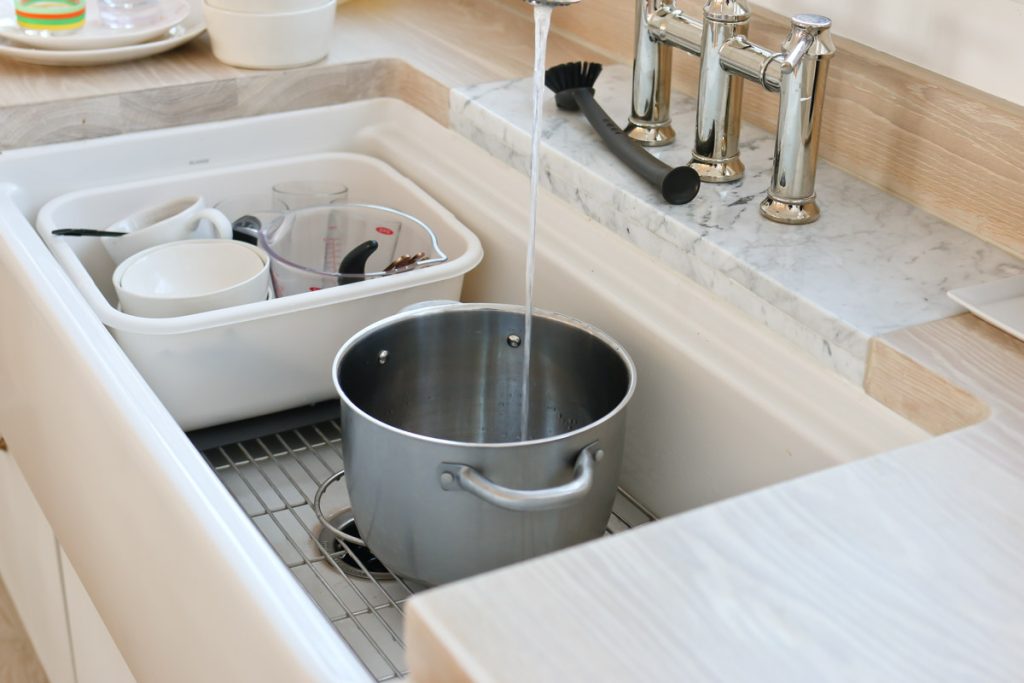
Put a drain stopper on the single sink’s flange and add enough hot water from the supply pipe. Also, ensure that the dishes are submerged in the water.
Note that you should pre-soak the dishes for approximately 15 to 30 minutes if they have stayed overnight. Add a few drops of dishwashing detergent and hot water.
Using hot water and dishwashing detergent
- Using hot water and dishwashing detergents helps clean greasy and oily grill pans.
- Hot water helps remove the excess dishwashing soap from the colander, grater, or even the ladle.
Step 4: Drain the soaking water and scrub the dishes
After all the dishes have soaked, remove the drain stopper and let the water drain.
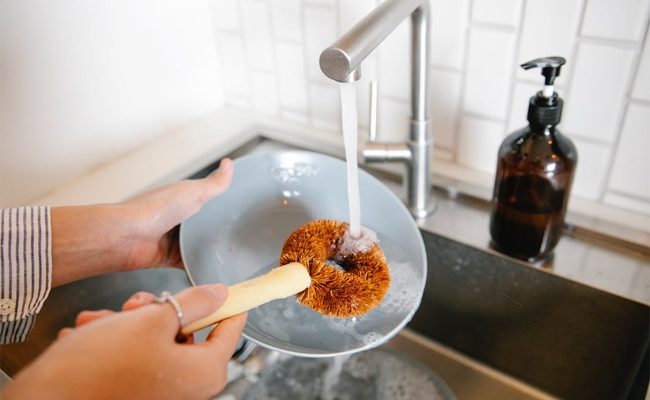
Use a dishwashing pad or any other similar tool to scrub the dishes.
Ensure that you thoroughly clean the dishes and do not leave any particles on the plates, cups, and silverware. Remember to wash the handles on the knives as well.
Use the dishwashing scrubbing brush if you have any hard-to-reach spots on the utensils.
Pro tips:
Make sure you hold the utensils firmly to avoid breaking them on the sink.
You will need to rinse the dishwashing pad and scrubber and apply more soap in between the washing process.
Step 5: Rinsing the dishes
Thoroughly rinse the dishes one by one after scrubbing the dishes with enough soap.
Turn on the faucet and use a sprayer hose to rinse the dishes. First, run warm water on the utensils, then turn the cold water from the supply pipe.
Also, make sure that grease does not remain on the dishes. You can quickly run your hand on the grilling pan to be sure.
Check the edges of the spatula, tongs, grater, and any other silverware to ensure that they are spotless. If you notice a missed spot, use a dishwashing pad to scrub it again and then rinse.
Note: You can alternatively put rinsing water on a separate basin and clean the dishes. This process avoids using excess running water.
Step 6: Drying the dishes
As you rinse the dishes, use a lint-free cloth to dry the dishes.
Carefully dry your dishes and place them upside down on a dish rack.
Step 7: Cleaning the sink
After you clean the dishes, then clean the sink.
Here are the steps to follow.
- Pour dishwashing soap on the sink
- Use a scrubbing brush to scrub the sink surface
- Rinse the sink
- Dry the sink with a paper towel or a dry cloth
You should use baking soda and vinegar if the sink has stubborn stains.
How To Wash Dishes by Hand
Washing dishes by hand is simple.
Remove leftovers
The first step is to remove all leftovers from the dishes.
Sort the dishes
Place dishes separately. You can use an extra basin to help you sort out the dishes and silverware. Put knives in a separate basin.
Soak the dishes
Soak the dishes to remove any stuck food particles on the plates. You can use an extra basin if you want to rinse the dishes one by one after scrubbing them with soap detergent.
Scrub the dishes
Use a dishwashing pad to scrub all the dishes thoroughly. Also, ensure that you do not leave any dirty spots on the utensils.
Rinse the dishes
Use enough water to rinse the dishes. We recommend using warm water then cold water.
Dry the dishes and place them in the dish rack
Use a clean and dry cloth to dry your dishes. Place the dishes in the dish rack and let them air dry naturally.
Conclusion
Note that you can efficiently hand wash your dishes in a single basin sink. However, the most important factor to consider is the amount of water to use. Some unrecommended techniques, unfortunately, require a lot of rinsing water.
Also, it is always advisable to rinse your dishes immediately after use. Rinsing the dishes helps to prevent food particles from getting stuck on the plates. It is also an efficient way of utilizing the amount of rinsing water.
Luckily, this guide has looked at the most efficient way of washing dishes in a single sink. Follow all the steps mentioned above for a much cleaner kitchen outline.
Leave a Reply