The kitchen must be functional and should also look chic. In recent years, the demands of many households on the interior have increased significantly. Noble materials – such as a granite worktop – and particularly timeless designs are just two examples of how tastes have changed in the past. When it comes to cooking, it seems that the eye doesn’t just eat on the plate. And the special look for the kitchen is now expensive for households. Also you can learn more here about refinishing kitchen cabinets.
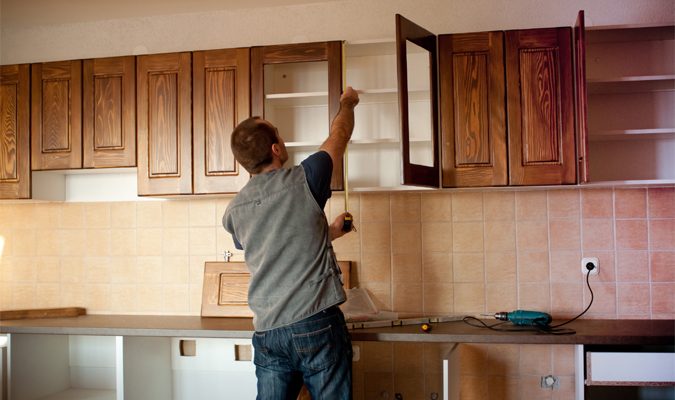
Deal With Damage Yourself
A state-of-the-art kitchen equipped with induction and a self-cleaning oven (pyrolysis) quickly costs more than EUR 10,000. All the more annoying when damage to the kitchen shows up after a while. Of course, there is still a warranty and a manufacturer’s guarantee for a broken stove or a defect in the refrigerator. But what if the deadlines have expired? Or the damage is not covered by the warranty? In this case, expensive craftsmen have to move in. Or do-it-yourselfers take matters into their own hands. Some of the common defects can be fixed by yourself.
The Closet Door Is Crooked: This Has To Be Done
Everything is still in place when the kitchen is set up. Then, after a few months, the shock: a closet door is crooked and no longer closes properly. Frequent opening or the steam from cooking can cause this to happen more often. After all, the material also works after installation. Realigning the closet door is one of the simplest tasks these days.
Step 1: Determine the skewing precisely:
First, use a spirit level to measure how much and in which direction the cupboard door is skewed.
Step 2: have a screwdriver ready:
The only tool you need is a screwdriver, usually a Phillips’s head.
Step 3: Readjust hinges:
The horizontal alignment and the depth adjustment are adjusted on the hinge on the inside of the cabinet, using the two middle hinge screws. If it pulls the cupboard door down at the stop, the overlay adjustment screw for the horizontal position can be the culprit.
Handle Is Loose Or Broken Off
Handle less cupboard doors in the kitchen are not available everywhere. Many households still rely on handles to open cupboards quickly. Over time, these may loosen. In the worst case, a handle breaks off completely. In this situation, do-it-yourselfers have a good chance of getting along without craftsmen.
Step 1: have a screwdriver ready:
Handles for cupboard doors are usually screwed on from the inside. In this respect, this construction makes it easy for do-it-yourselfers to become active here themselves. It is often enough to simply “arm” yourself with a screwdriver (Phillips).
Steps – tighten the screws: simply tighten the screws. At first, only one screw comes loose. Due to the load, the second screw is also loosened at some point.
If the handle is broken off, the process looks different:
Step A: Get a new handle:
Suitable handles may be available in hardware stores. Otherwise, the handle must be ordered from a specialist kitchen retailer.
Step B: Remove the old handle:
The old handle can be easily removed with a screwdriver on the inner screws.
Step C: Attach new handle:
Remove the new handle from packaging and attach it to the cabinet according to assembly instructions. Attention: Do not forget to attach the washers here!
Step 4: Tighten: Tighten the screws with the screwdriver.
Paint Damage On The Surface
When handling pots or pans and cooking utensils, it can happen in the heat of the moment that scratches occur in the paintwork on the kitchen front or the worktop. This damage is not relevant for the functionality, it remains cosmetic. Of course, it doesn’t look pretty. What can you do here as a do-it-yourselfer?
Surface scratches are difficult to repair. Hard wax can still be used on real wood. Various manufacturers now offer corresponding products – often combined with corresponding melting sticks.
1: Step: Clean the scratch, the surface must be dry and free of grease.
2: Step: Prepare the melter according to the instructions.
3: Step: Melt and apply the wax (caution: work overhanging)
4: Step: touch up scratches.
With a scratch in the high-gloss finish of the kitchen front, the whole thing is much more difficult. Here the smallest damaged areas outside of the direct field of vision may have to be repaired – if the right paint is available. As soon as the damage gets worse, the result often doesn’t look any better – which is why you should think about replacing the cabinet front in question at this point.
Push-To-Open (Tip-On) Mechanism No Longer Works
Handle less cupboard doors are now offered by many manufacturers. The advantage: cabinet fronts look uniform and thus offer a particularly elegant and puristic look. For some users, however, the feel doesn’t go far enough. But if you don’t support push-to-open, you don’t have to use this technology in the kitchen. If the decision is made to do so, the kitchen will appear a bit more premium.
It can always happen that the push to open no longer works satisfactorily. How to fix this? The first thing to check is the form in which push-to-open is implemented. Various models have established themselves on the market.
In the case of a push-to-open mechanism, which is used in combination with hinges with a locking mechanism, there is often no magnet installed. Hinges without the self-closing mechanism are used with magnetic push-to-open models. If the cabinet no longer closes correctly, this may be because the push-to-open pin has to be readjusted – for example by turning it in or out.
If the machine is defective, the only option is usually to replace it, since the push-to-open hardware is usually delivered encapsulated by the manufacturer. Caution: Some manufacturers offer drill-in models, which can make replacement difficult. Here it is worth considering whether screw-in models would not be the better choice.
Veneer is coming loose: regulate or firewood?
A big problem is a veneer, which peels off the edges of the cabinet door over time. Many consumers now think that the closet door is a case for bulky waste. But: Under certain circumstances, the cabinet door can be saved.
The veneer is only just beginning to come loose:
If the damage is noticed very quickly, veneer glue can be used to remedy the situation. The use of a cannula helps to bring the glue precisely under the veneer.
The veneer has been damaged for a long time:
A little more effort is required here. First, get the right veneer with hot-melt adhesive from a furniture store. Then cut off the damaged veneer and clean the area underneath. Then apply the new veneer with the glue using an iron. After cooling, the new veneer should be firmly bonded to the cabinet door.
What should do-it-yourselfers keep their hands off?
Do-it-yourselfers can also do many things. As shown, it is even possible to re-glue damaged veneer to the edges of the kitchen cabinets. However, some areas should always be reserved for technically skilled experts. What is this all about? Everything that has to do with power lines is usually no longer for the do-it-yourselfer.
In addition, there are defects in the electric cooker or the oven, which should only be tackled with a lot of experience – and
only without electricity! Mistakes here quickly have dramatic consequences. In questionable cases, it is always safer to ask handymen for help. Especially when it comes to warranty and guarantee, it is better to choose this way in order not to lose the claims.
Conclusion: Fix Simple Damage In The Kitchen
Kitchens are becoming more and more expensive to buy. Sudden damage is all the more annoying. If the whole thing is covered by the guarantee, the problem is quickly solved. If you want to do without expensive craftsmen, you can use the tools yourself. Many defects, such as cupboard doors hanging crookedly, can be repaired without the help of a craftsman. Experienced do-it-yourselfers can even repair a damaged veneer. Other damage and defects are always something for the specialist – as soon as it comes to live parts or water connections.
Leave a Reply