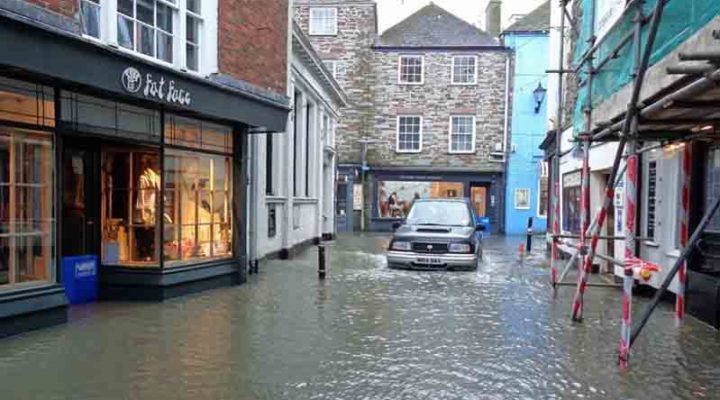
Floods can kill people and bring serious damage to business, homes, and properties.
It’s heartbreaking to be hit by this natural disaster because without the proper preparation, lives and properties can be at risk. A flood can weaken the foundation of the home or establishment once they get wet. This may lead to collapse as well as other unwanted results to property owners. In times water damage Houston affects the lives of property owners, the need for professional assistance becomes a crucial factor to consider.
After the flood, it’s time to assess the water damage and have it repaired as soon as you can. The longer you wait, the more likely you are to have severe damage to your home. More leaks can happen and standing water can even make the structure less stronger. Plus, mold starts to grow after 24 hours–you don’t have time to wait.
After you’ve hit with a flood or any other disaster, then you must strive to keep taking actions instead of waiting for the problem to get worsened. Assess the water damage as soon as possible to prevent mold buildup and create bigger damage to the affected area.
Identifying the Types of Water to Cleanup
To be able to make a DIY water damage repair, a clear understanding of the types of water is very important. This will help in analyzing the possible damage and what actions are to be taken care of.
Type 1: “Clean” Water from Leaky Pipes and Water Rain
This type of water can be relatively harmless but it will be still a good decision to do the basic damage cleanup. This is to ensure that no standing water will cause future issues to health and properties.
Type 2: Slightly Dirty Water
This type of water usually appears to be gray and come from clean toilets, washing machines, and dishwashers. They may not be extremely dirty but still, they may contain contaminants. If you decide to get rid of it, then you must wear proper safety gear to protect yourself.
Type 3: Black Water
This is the water that comes from extreme flooding from nearby water forms and sewage. This brings a lot of risks since it contains bacteria, wastes, and other contaminants. Cleaning this type of water is usually done by the professionals in doing water damage repairs.
Water Damage Repairs: A Detailed Guide for you to Follow
In case you are armed with the right knowledge on how to perform do-it-yourself water repairs, then it will be good since you can save money instead of hiring a contractor. Especially if you have a light to moderate water repairs needs, then there’s no need to call a professional. You can do it yourself, but of course, you need to be properly equipped with knowledge and tools.
The following are the detailed steps for you to follow:
Assessing the Damage
The first step is to check and evaluate the water damage. To do that, make sure that the power supply from any outlet is turned off. Water is a conductor of electricity and neglecting to turn off the circuit breaker while checking the leak may cause accidents.
Check for sagging ceilings and walls for they may be caused by dripping water. Try to find coffee-colored stains which seem to become bigger over time for these may sign of starting water damage as well.
Do not focus only on the obvious signs. It’s not always easy to locate the source of water damage. Do further exploration and checking to find the exact source. Once you’ve done a comprehensive assessment of the damage, then you can now plan to do the repairs yourself or if you need to call for professional help. In addition, you can check your insurance and see if you can have a claim filed.
Drying out the Affected Area
Getting rid of all the moisture in your home the soonest possible time is a big concern to consider. This will ensure that the additional damages such as mold growth and weakening of structures will be avoided. In case of small leaks, open the windows or use fans to let the air circulates in the area. You can also use even a hair dryer to dry out smaller leaks.
However, if the damage is serious and have affected a larger area, then having a large dehumidifier will ensure to dry out the room thoroughly. Larger leaks can seriously affect carpet, wood, and other items in the area so make sure they are completely handled and no moisture will be left behind.
Removing the Damaged Drywall
Checking and removing damaged drywall is the next step. To start with, you need to place a tarp or something to catch any drywall debris and dust. Wear protective gloves, goggles, and dust masks for your safety. Check how much damage the drywall has acquired. You can repair or just do some cutting if there’s only a damaged portion of the drywall. However, you might need to remove the whole drywall panel if needed.
Carefully cut the damaged part of the drywall using a keyhole saw or a utility knife. A rectangular or square shape will be perfect to cut so it will be easier to be replaced after.
In case you have to replace the entire drywall, remove it by hand or use a wrecking bar or hammer.
Replacing the Drywall
Get the measurement of the square or rectangular piece you have cut from the wall. Then, use that measurement to cut out a piece to be used as a replacement of the drywall. Ensure that you have allocated an allowance of a few inches bigger than the hole.
Place the piece to patch the hole after applying a thin layer of joint compound. Then, press the compound into the wall using a puffy knife. Let it dry. Then, use fine sandpaper to smoothens it. Apply another layer of compound to make the hold stronger.
However, if the hole is bigger than six inches, then you might need more support for your patch. To do so, drill two small holes on the replacement drywall. Then, get a piece of string and tie it to a stick which is kept on the front side. In this way, you can have a temporary method of keeping the drywall in place while drying.
After placing the patch in the hole with the compound, you need to twist the stick so the pressure will be applied to the side of the board. After the adhesive holds the patch, let the stick turn clockwise increasing the pressure. In this way, the board will be kept in place as the compound dries completely.
Inspecting for Mildew and Mold
The damaged materials can be a perfect place for mold and mildew. That’s why you need to perform a thorough inspection as soon as possible. This is because mold can start growing within 24 hours as permitted by certain environmental conditions. Mold and mildew can cause mild to serious health conditions as well as threats to other parts of the property.
Getting Rid of Damaged Porous Materials
Materials such as insulation, carpet, and fabrics are porous and once soaked in water can be a cause of problems. Therefore, they should be removed and thrown away.
Disinfecting other Materials in the Affected Area
After getting rid of the damaged materials, make sure to disinfect the whole area. You can use bleach solutions or other homemade options.
Focusing on Ceiling Water Damage
Make sure to not forget your ceilings because having them exposed to water damage make them prone to dangers because of gravity. Thus, remove the dampened ceiling panels first to avoid rook leaks and problems.
Replacing Damaged Wood
Aside from the ceiling, you also need to assess damaged flooring and other rotting wood parts especially if they have starting to develop mold and mildew. Make sure to thoroughly clean the area before replacing them.
Installing New Floors
Wet carpets and damp floorboards are signs that you might have damaged floors. To be sure, you need to check as soon as possible if there’s any moisture trapped underneath.
#Inspecting and Installing External Siding
Siding materials can be prone to water damage as well. In this case, the biggest risk is the water sipping behind the sidings which can lead to permanent problems.
Priming and Painting
Once an assessment is done and all damaged materials are removed and replaced by new ones, then it’s time to do work on the finishing touches. You might want to bring back the original appearance of your home or create a new look. You can seal the damage or replacement by applying paint on it. Application of a primer to the new material can be also a good decision. In case you feel that the paint color does not match the wall color, then you can go for a repainting job.
Check with your Insurance Company
If you think there’s significant damage in your property, it will be also advisable to check your homeowner’s insurance. By doing this, you can find out if the damage will be covered by the insurance company.
Once you have decided to do a do-it-yourself water damage repair in your property, keep in mind that this will requires a lot of work. This will as well entail some costs of supplies and time to be spent on the job. Follow the above-mentioned tips and guide so you won’t miss anything. In case after assessment and you think you can’t handle the damage by yourself, then do not hesitate to contact and ask the assistance of the experts.
Leave a Reply